Vacuum Sealer Troubleshooting: Quick Fixes for Common Issues
When you buy through our links, That’s My Home may earn an affiliate commission. Learn more
Whenever you are working with a mechanical appliance, there is a chance of something going wrong. Vacuum sealers are no different. Sometimes the fix is simple; sometimes it is a little more complex. The best way to determine what has gone wrong for any appliance is to follow a step by step checklist. Start with the simplest, most obvious solutions and work toward the more difficult ones. This process serves you well for two reasons. First, the most obvious solutions are often the most common and can offer you a quick fix. Second, the simplest solutions are the ones you can implement yourself. If you have worked down your list of possibilities to the point where the fix is complicated or expensive, then you can decide if you want to continue working on your existing appliance or replace it.
In this article, I will take you step by step through troubleshooting malfunctions with your FoodSaver Vacuum Sealer. Some of the solutions may seem pretty easy and ones you could have thought of yourself. But that is the idea; we will start simple and work our way up. Hopefully, one of the initial easy fixes will be the one that works for you!
Work Your Way to a Solution
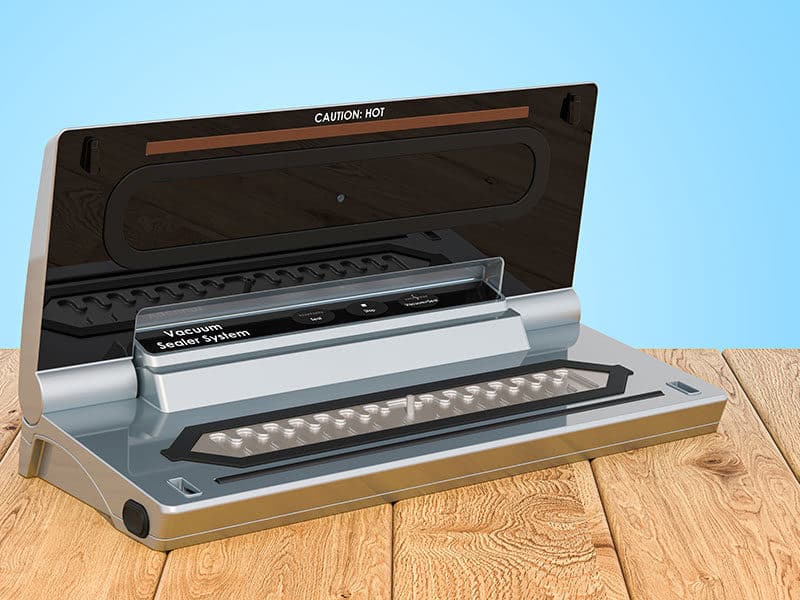
FoodSaver Vacuum Sealers are all based on the FoodSaver technology that involves a separate vacuum and sealing function. When evaluating a problem with your FoodSaver, you should take the same approach as you would with any appliance. I recommend that you work from the outside to the inside in a systematic fashion.
To fix your FoodSaver system, start with the power supply, then the materials that you are using. Finally, double check your own actions to make sure you haven’t missed an important step. Here is my outside-in approach to appliance troubleshooting.
The Power Supply Checklist
- Is the outlet receiving power?
- Is the cord intact and attached to the appliance?
- If the appliance works on a battery charge, is the battery fully charged and installed correctly?
Is the Outlet Receiving Power?
An appliance doesn’t run without power. Have you ever tried to use your microwave or toaster only to be frustrated that it isn’t working? Sometimes the machine has actually worn out. But I can’t tell you the number of times I’ve been frustrated with the appliance only to find that the real problem is the power supply. In our house, if too many appliances are on the same circuit and running at once, a breaker will trigger and cut off power to some outlets. So if I plug in an appliance and it doesn’t start running, the first thing I do is to check other appliance on the same circuit to see if they are getting power.
A single outlet can malfunction too. Sometimes switching to a different outlet solves my problem. Also, keep in mind that FoodSaver Vacuum Sealers feature polarized plugs; they must be plugged into the outlet correctly to work.
Is the Cord Intact and Attached to the Appliance?
If your FoodSaver sealer doesn’t seem to be powered and the outlet is not the problem, check the vacuum sealer’s cord. If your vacuum sealer’s power cord has been crimped or pulled away from the appliance, this could be your problem. Maybe the cord was caught on something during storage or accidently pulled from the machine. I once had a pet cat who would chew on power cords. While he amazingly survived the experience, many of my appliances did not! If you have kept your vacuum sealer stored in an RV or cabin and only pull it out for occasional use- check inside and out for damage caused by mice.
Is the Battery of Your Portable Vacuum Sealer Fully Charged?
FoodSaver handheld vacuum sealers are really handy since you can take them almost anywhere. But they do need to have their power refreshed regularly. Sometimes, when I think I am recharging my phone, I pick it up later to find it has no power at all. The problem is that if I don’t place it just right, it sits on the charger but doesn’t receive any power. When plugging your FoodSaver handheld in for recharging, make sure that the adapter is fully connected and actually charging.
The Materials and Supplies Checklist
- Are Your canisters, bags, and containers intact and in good condition?
- Are you using textured bags?
Are Your Supplies in Good Condition?
Vacuum sealing depends on being able to remove all the air from a bag or container. If there are any holes, tears or cracks in your bag or canister, your vacuum sealer won’t be able to work. Even a small hole is a big problem once the suction of your vacuum sealer engages. For every bit of air your sealer pulls out, fresh air will be pulled right back into the container.
If you can hear and see that your vacuum sealer is suctioning, yet your container does not appear to be losing air, begin a thorough inspection. For bags, check the bottom and side seams for splits. The seams along the side of your storage bag are intended to be sealed all the way to the edge if they are not this could be the source of your leak. FoodSaver specifically recommends that you do not try to create side seams when making your own bags to avoid just this problem.
Also, check the body of the bag for holes. If the food placed in the bag had pointed or sharp edges it is possible that the bag was damaged while you were filling it. Your bags might have accidentally been cut or torn during storage or shipping as well. Wouldn’t it be a relief to find out that the only thing wrong with your FoodSaver is a bad batch of storage bags!
If you are using a zipper bag with a handheld sealer, the zippered closure must be completely sealed for your vacuum system to properly work.
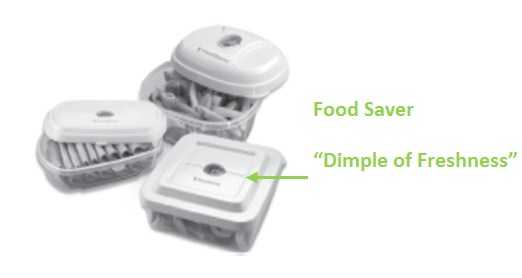
FoodSaver canisters and containers have a custom design to allow the FoodSaver accessory to attach and remove all air from the container. If you are not getting proper results, inspect not only the canister itself for cracks but also take a look at its vacuum valve. If your canister or container is sealing properly, you should see that the valve is indented when your vacuum sealer is removed.
Are You Using Textured Bags?
If you recall from this article about choosing the right bag for use with your FoodSaver channel sealer, only specially designed bags will allow the proper vacuum action to take place when used with a vacuum sealing system. If your bag is completely smooth on both the top and bottom edges, then once your vacuum sealer is clamped down tight there will be no passageway for air to be pulled out. The tiny channels formed by the texture of the bags in essential to the proper functioning of your FoodSaver vacuum sealing system. So if you don’t see that vacuum action, double check your supplies to make sure they are the real thing.
The Human-Machine Interface Checklist
- Are you properly filling the container before attempting to seal?
- Are you placing the bag or vacuum accessory correctly?
- Are you selecting the correct function for the task?
Are you properly filling the container before attempting to seal?
This is where you begin to test the steps you have been following to see if you are doing them correctly. Canisters and containers require approximately one inch of room at the top after they have been filled. If your sealer doesn’t seem to be working, be sure that you are leaving this gap when filling your containers. The valve for zipper bags or containers must be clean to seal well. Additionally, even though some canisters and containers are designed for use with liquids, zipper bags are not. Make sure you are selecting the correct container for the food that you want to store. You can refer to this article for tips on storing liquids and moist foods.
For channel system food storage bags, the bag’s ends must be long enough to hang over the sealing strip of your vacuum sealer and into the vacuum chamber. Therefore, it is important that you leave enough room in your bag. You will need to leave three to five inches of room for this overhang, depending on the type of food that you are sealing. The reason for this extra length is that the bag starts sealing around your food some of this excess material will be needed. If your bag is too small, the ends will pull out of the vacuum chamber during sealing and air will be introduced. Just as with the other containers, you must make sure that there is no liquid or food residue on the edge of the bag that you wish to seal. Remember, you want to have only the bags tiny channels for air to pass through. Any other interference with these two surfaces pressing together will impede the vacuuming process.
Are you placing the bag or vacuum accessory correctly?
Proper placement of your storage bag in your vacuum sealer is essential to getting a good vacuum and seal. In fact, if you don’t place your bag completely in the vacuum channel, you won’t be suctioning out air at all and will just heat seal the bag. To get proper suction, both ends of the bag must be completely smooth.
Note: I have seen many experienced food sealer users write that placing the embossed or textured side of the bag on the bottom, against the sealer bar is best. FoodSaver indicates that the side that is on the bottom does not matter, but recommends that if the bag is curling, you place it so that the ends curl down over the sealing bar.
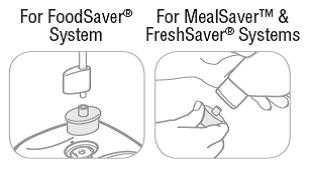
For containers, first check to see if the lid of your container is placed securely. If you are using the jar accessory to seal canning jars, you may need to remove the outer ring lid and just use the flat top when sealing the jar. Also, check the connection between your vacuum sealer and the container. Your FoodSaver will either come equipped with an attachment similar to the stand-alone handheld system or an accessory hose. If your system uses the accessory hose only, you will probably need to attach an adapter to use the vacuum sealer on canister and containers. If you are trying to attach an adapter or hose to a container and not getting a tight seal, check the instructions for that particular container to see exactly what you need to use.
Are you selecting the correct function for the task?
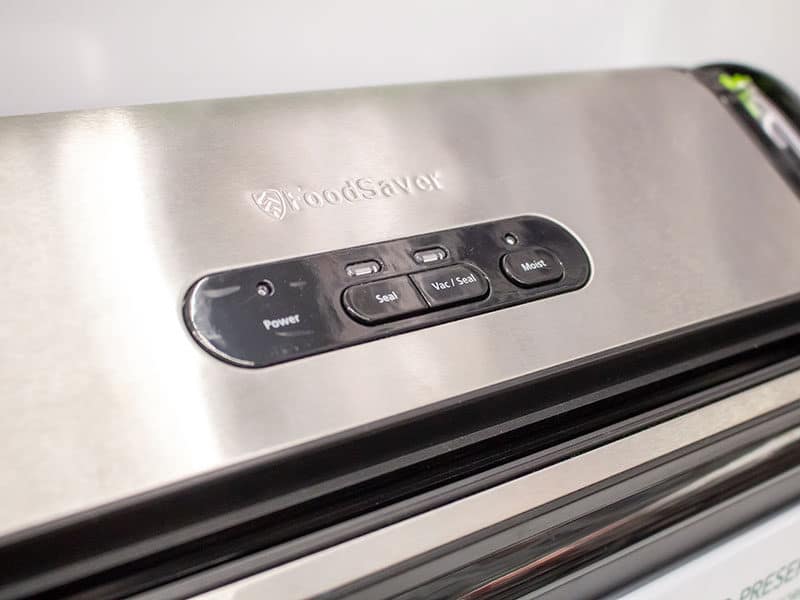
Most modern FoodSaver systems offer you the option to vacuum seal or only heat seal a bag. The seal-only option is used to close packaged foods such as chips or cookies that you may not want to vacuum seal. The seal-only option is an easy short-term bag closure tool. But if you are pushing the seal-only button or accidentally hitting this button during the vacuum sealing process, then you aren’t going to get a vacuum seal on your bag. Other vacuum sealers have additional buttons that allow you to cancel or interrupt the vacuum process, use pulse vacuuming for delicate foods, or marinade modes to seal marinades. To activate your vacuum sealer’s accessory hose you may need to press a separate “accessory mode” button. If you don’t get the results you want, read through the user manual for your specific FoodSaver to make sure there isn’t some extra button or step that you are missing.
If you have made it this far and are still having trouble with your vacuum sealer, you may need to replace a part or dig deeper into your machine’s inner workings. Because these steps are a little more complicated, I will have to cover them later. In the meantime, you can always visit foodsaver.com to read the instruction manual for your specific sealing system.





The power light does not go on. I just bought the food saver FM2106. I can’t get the knob to turn all the way to operate after I close the top. It will move all the way to operate when I have the kid up. The power light does not go on.
Dear Linnette,
First of all thanks for contacting us. It appears that you have a malfunction at your item. I would suggest that you contact the supplier and explain the situation.
If you recently bought it, you probably have a warranty.
Kind regards,
Marry
Hello I purchased the food savor with the accessory vacuum FM5100 or may be 5200..
My accessory is not sucking at all… Can I replace it? it only comes out so far… and I dont know
how to get into it and that will probably void the warranty.. I have a 5 year warranty… this
machine is used every single day… I’m going crazy here… Can you help me? I look in the
trouble shooting in my little Manuel and called the phone number, but of course it is Sunday..Closed
Please help me
Dear Diane,
First of all thanks for contacting me.
I know that you are afraid to lose the warranty, but you should contact the supplier. If the accessory is not listed in the warranty, then at least you will know exactly what are the next steps.
The worst thing you can do is to try to fix it by yourself. You can end up doing more harm and then you will definitely lose the warranty.
Kind regards,
Marry
I just purchased my aobos YVS-102i. Vacuum sealer. About 3 months ago and it want lock on the right side.please help
Dear Patricia,
First of all thanks for contacting me.
The best advise I can give you is to contact the manufacturer. Explain the issue and see what they have to say. The last thing you want is to try and fix it yourself and lose the warranty.
Kind regards,
Mary Ellen
I have not used my 3 year old Food-saver vacuum bag sealer very often and now the automatic sealer that grabs the bag before sucking the air out and then sealing it will not close and grab the bag. I was sealing some bags and then it will not grab the bag …. it stays loose even though the power is on nothing happens no matter how I move the bag in and around..
Dear Dale,
First of all thanks for contacting me.
Have you checked the automatic sealer to see maybe is clogged or it got damaged? If you don’t see any physical issues on it, then I suggest you contact the manufacturer.
Your model may still be in its warranty period. If not at least they will tell you exactly what the problem is so you won’t do more harm trying to solve it on your own.
Kind regards,
Marry
The Tray full light want go off after I empty and dry the tray
Dear Margie,
Thanks for reaching out!
I have had the same problem. What you need to do is make sure it’s completely dry. Inside and out, even in the small spaces, the tray goes into.
The dip tray senses liquid across any of many contacts, any liquid will trigger the light. Mine had liquid in the detector tray that the drip tray sits in.
I had to clean it out with a paper towel. After that, everything was fine, If this doesn’t solve your problem, check out the solutions of others here.
Hopefully, you will find my answer helpful.
Kind regards,
Marry
Foodsaver fm5200
Will not vacuum out bag to seal it.
The machine grabs the bag when pushed into seal and makes noise to seal however it just keeps running and doesn’t suction. Food saver has been working fine last uses, pulled it out today to find this problem. Any ideas?
Dear Brittany,
Thank you for contacting me!
First, close the lid of the unit without placing a bag in it. Start the appliance and let it go through its cycle. When the unit stops, gently touch the seal bar. Is it hot/warm?
If the seal bar is not hot or it is too hot (and the bags have melted), then there may be something wrong with the sealing bar.
Are you trying to vacuum package items that are not moist? If so, test the bag by placing a spoon in a bag and place the end of the bag into the vacuum channel, close the lid and press the ON button. Lock the side clips or press down on the lid and allow the unit to go through the entire cycle. If the bag seals, then now you can vacuum/seal bags.
(If the bag seals, you are now able to vacuum/seal bags). Are you trying to seal moist items, such as unfrozen meats or fish? Try placing the meat or fish in a bag, then taking a paper towel and folding it in half twice. Place the folded paper towel into the bag so it is between the item and where the bag will be sealed.
Place the open end of the bag into the vacuum channel, close the lid, and start the vacuum/seal process. The paper towel traps excess liquids and won’t affect the flavor of the food item. If the unit seals properly, then you should be able to vacuum/seal bags.
You can also slightly pre-freeze meat or fish for 15-30 minutes to eliminate some of the juices. While examining your appliance, check the lower gasket for any cracks, dents, or food particles. Please clean the gasket by wiping it with a cloth.
Also, watch this video or read this troubleshooting guide.
Kind regards,
Marry
my unit is a v2244 it quit sucking i tried everything it made a grinding noise i thought it was hooped i took veg oil and put couple drops down the suction tube noise gone and its working again donot know for how long but good now ..ps is an old unit
Dear Cal & Paz,
First of all thanks for contacting me.
I hate to say, but you should work with it as it is for as long as it lasts and then invest in a new model. Unfortunately, these products have a limited life and when they start to make noises and are not in their ‘youth’ years, there aren’t many things that can be done.
Kind regards,
Mary Ellen
Both the Dry and Wet lights on my sealers panel are flashing simultaneously and constantly. I have removed the drain tray and completely dried both it and the receptacle it goes into. I have recycled power by unplugging the sealer. The lights flash as soon as I depress the power button. I filled out a request for help form on their web site support page last week but have not heard back (aside from the “request received” email). Any ideas what might be causing this?
Dear Mark,
Thank you for reaching out!
The seal indicator flashes to signal an ERROR. Please, review the following:
1. Check the power cord to see if it is firmly plugged into an electrical outlet.
2. Examine the power cord for any damages.
3. See if the electrical outlet is working by plugging in another appliance.
4. Check to be certain the Upper Bag Detection Tray is properly inserted.
5. Check to ensure Release Buttons are properly latched.
6. Check to ensure Foam Gasket is properly inserted into the gasket channel.
7. Check Gaskets around to make sure they are free from food material.
8. Lower Drip Tray must be firmly snapped into place.
9. If overheated, allow the appliance to cool for 20 minutes.
If you can’t solve the issue on your own, wait until the seller answers your message. If you don’t receive an answer, take the machine to a local technician and ask for assistance.
Kind regards,
Marry
This is caused by moisture – take out the drain tray and dry it completely – particularly the area around the metal contacts. Also use paper towels and dry out the inside. Either let it dry or use a hairdryer to completely dry out the inside where the drain tray goes, Again particularly where the metal contacts are. When totally dry, plug in and turn it on – should work.
Dear,
Thank you for sharing your tips and solution. I’m sure that someone will find your input helpful. Feel free to share your thoughts and comments in the future as well.
Have a great day and stay safe.
Kind regards,
Marry
Mine is doing the same! Did you ever figure out what caused this and how to fix it?
Dear Mike,
What issues are you experiencing with your vacuum sealer? I would like to help so feel free to reply to this comment and we will find a solution together!
Kind regards,
Marry
Tray is full light will not turn off on my food saver machine
Dear James,
Thank you for reaching out!
I have had the same problem. What you need to do is make sure it’s completely dry. Inside and out, even in the small spaces, the tray goes into.
The dip tray senses liquid across any of many contacts, any liquid will trigger the light. Mine had liquid in the detector tray that the drip tray sits in.
I had to clean it out with a paper towel. After that, everything was fine, If this doesn’t solve your problem, check out the solutions of others here.
Hopefully, you will find my answer helpful.
Kind regards,
Marry
Machine stopped after the vacuum was drawn.
Will not seal, release the bag, turn back on nor can we open it. This is the first item we have tried to seal today and unit approx 3 years old…..model v3460
Dear Chris,
Thank you for your comment.
Check out these troubleshooting tips. Also, read this troubleshooting guide. They both contain possible reasons why your machine doesn’t seal.
You can also find the solutions of other consumers on this forum helpful. They explain how they solved this problem. Hope this helps!
Kind regards,
Marry
My marinate container does everything correctly but when I turn it to the closed position after the vacuum cycle it does not seal. I have no idea what has happened but while cleaning it the knob was turned all the way to the left and and unscrewed from the lid. It screwed back on but there was a tiny little clear washer that was put back into the lid. Is it possible that their is another missing by washer?
Dear Sean,
Thank you for your comment.
I’m not sure because I don’t know the model of your vacuum sealer. Please, contact the seller and explain the issue so they can assist you.
Also, check out this video with tips!
Kind regards,
Marry
Here’s our situation:
Our private coffee club buys bulk, fresh roasted beans and vacuum packs them in a small bags with a FoodSaver machine. Things went well for over a year. The problem started about 5 months ago: the bags would vacuum seal like before but the next day every bag was loose. I contacted FoodSaver; they walked me through some troubleshooting, sent me new seals for the machine, new bags. Nothing worked. So I bought a newer model. The same thing is happening! Every bag fails. Ever heard of that?
Steve
Dear Steve,
First of all thanks for contacting me.
Truth be told, this is the first time I am hearing this situation. Did you try to use different types of bags or the same model? Maybe the problem is in the bags. Also, did you try to put fewer coffee beans in a bag and see if the situation changes?
Let me know so, we can try and work this out together.
Kind regards,
Mary Ellen
Hi I also have issue my professional ll deals but wont suck air out when trying to use it I’ve also went thru manual and tried everything still not working
Dear Nadine,
First of all thanks for contacting me.
I don’t want to assume about your situation and advise you in the wrong direction. It is very difficult to put a diagnosis without seeing the product. This is why I would advise you to contact the manufacturer and explain to them the issue. You don’t want to start fixing it yourself and lose the warranty.
Kind regards,
Mary Ellen
Hi. My vacuum sealer went totally dead. I’ve checked the power supply inside the unit and have power there. The lights does’nt even light up. The sealer unit stay cold.
Dear Colin,
First of all thanks for contacting me.
This is definitely a malfunction that you should address the manufacturer about. It might be a cable situation or an electrical one, but you should not assume anything and try to fix it yourself without understanding what is causing the problem.
Kind regards,
Mary Ellen
I have a Foodsaver V2860. Everything works great *except* I have to press down on the lid for the vacuum to actually do its job. I noticed the drip tray looks like it should have one, vertical, tips at each end and appears one of them broke off. Would that cause the machine to not latch properly? Thank you!
Dear Shelly,
First of all thanks for contacting me.
It could be the result of a hit or fall. Did you notice to have any signs of not being taken care before the delivery?
Kind regards,
Mary Ellen
I have ModelV2460 and use maybe 3-4 times per summer at my lake home. It vacumns but won’t seal. It continues to run when bag is vacuumed, and I’m afraid it will over heat. I did replace rubber gaskets thinking maybe that could be a problem.
Any hints?
Thank you!
Dear JoAnn,
Thank you for your comment.
Please, follow the troubleshooting tips in this article. If they don’t help, I kindly suggest that you take your vacuum sealer to repair service.
Kind regards,
Marry
My food saver has always worked great until now. When I turn it on it makes a loud noise as if it’s vacuuming. It sounds as there is something wrong with vacuum pump. Any suggestions on how to fix?
Dear JoAnn,
Thank you for your comment.
Please, follow the troubleshooting tips in this article. If they don’t help, I kindly suggest that you take your vacuum sealer to repair service.
Kind regards,
Marry
I have the original foodsaver by Tilia. It works fine for jars but now it won’t vacuum when the switch is on bags. Is it the switch? How can I fix it?
Dear Mark,
Thank you for your comment.
It’s possible. However, please contact your dealer for firsthand information. Also, check out this forum with people who share similar issues.
Kind regards,
Marry
My foodsaver has started using only the moist function which makes it operate slowly and does not vacuum completely. I push the dry button and it goes back to moist when it vacuums. What can I do?
Dear Linda,
Thank you for your comment.
You would utilize the moist feature if you’re attempting to seal foods that have any liquids or possible moisture in the bag. Not including soups and sauces. The appliance will pull any added moisture into the removable drip tray.
Fold a paper towel to fit your bag for wet foods. When you seal this stops moisture from getting to the sealing surface.
If your food saver uses only the moist function, perhaps it malfunctioned. Please, take it to the closest repair shop to get it checked. Also, check this troubleshooting article for tips.
Hope this helps! Have a lovely day!
Kind regards, Marry.
My Foodsaver seals but the vacuum part makes a noise like it is pulsing instead of always just drawing air out. Has worked great for 2 years, gaskets look great. Suggestins?
Dear Bart,
Thanks for reaching out!
Normally there is some noise. It should be a loud humming noise, sort of a rattle, but not a noxious. Please, check out this troubleshooting guide.
Have a lovely day and stay safe.
Kind regards, Marry.