Maximize Food Freshness: Using Your Vacuum Sealer with Storage Bags
When you buy through our links, That’s My Home may earn an affiliate commission. Learn more
General Preparation and Set Up
First, do a quick inspection of your vacuum sealing machine. Make sure the drip tray and sealing gasket or strips are in place and in good condition. Then clean your workspace and select the tools you are going to need. Remember that if you are going to be processing and packaging different types of foods, you’ll need different utensils.
Next, clear space for your packaged foods. If you are packaging foods that will need to be refrigerated or frozen, check to make sure there is storage space available. This advance step will keep you from having food sitting out on the counter getting warm as you clear space later. If you are planning to package a large amount of cold food at once, consider using a cooler to hold the finished packages.
You should go ahead and label your storage bags now as it is easier to write on them before they are holding vacuum sealed foods.
If you want to add a moisture absorption packet to your dry goods storage bags, have these on hand before you begin too.
The remaining steps that you’ll need to complete will depend on the foods you plan to seal.
Preparation and Set Up for Each Food Type
Excessive food particles, debris, or liquid will not only damage your vacuum sealer’s motor but will also prevent your bags from sealing properly. Improperly prepared packages or food can lead to poor seals. The following suggestions will help you prevent a bad seal and machine damage.
Powdered Foods
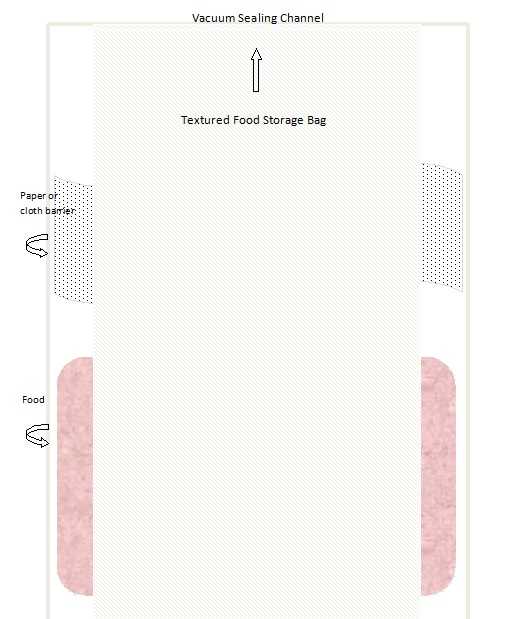
If you are going to be packaging powdery foods such as flours, coffee, or tea, you will want coffee filters or other materials on hand to place at the top of your bag. The filter will prevent dry materials from being sucked into the vacuum sealer during the sealing process. Alternatively, you can leave the dry goods in their original packaging or a separate plastic bag and seal the entire package in a vacuum bag.
Moist Foods
For moist products, you should use a paper towel between the top of the food and the opening of the bag or pre-wrap the item in a plastic bag before vacuum sealing. The paper towel will catch any moisture that is sucked toward the sealing channel and prevent it from entering the vacuum sealer’s motor.
If you don’t want to use paper products with your foods inside the storage bags, you can substitute cheesecloth or other food safe textiles as the barrier.
Liquids and Super Moist Foods
To prevent liquids from being sucked into your machine, freeze the liquid or very moist food before packaging and sealing it. Freeze the food in a container that is slightly smaller than the bag you plan to store it in then pop the solid block into the bag for sealing. If you don’t want to take the time to pre-freeze a liquid, try the double bagging method. Place your liquid in a regular plastic food bag and then into the storage bag for vacuum sealing. You will need to be careful to watch for escaped liquids and stop the vacuum process if excessive liquid begins to enter the sealing channel.
While your vacuum sealer may have a drip tray or other features designed to prevent liquid from being sucked into the motor, this feature is a safeguard and not a guarantee. The less liquid to make it to sealer the better it is for both the maintenance of your vacuum sealer machine and for the integrity of the vacuum seal.
Sharp or Bulky Food
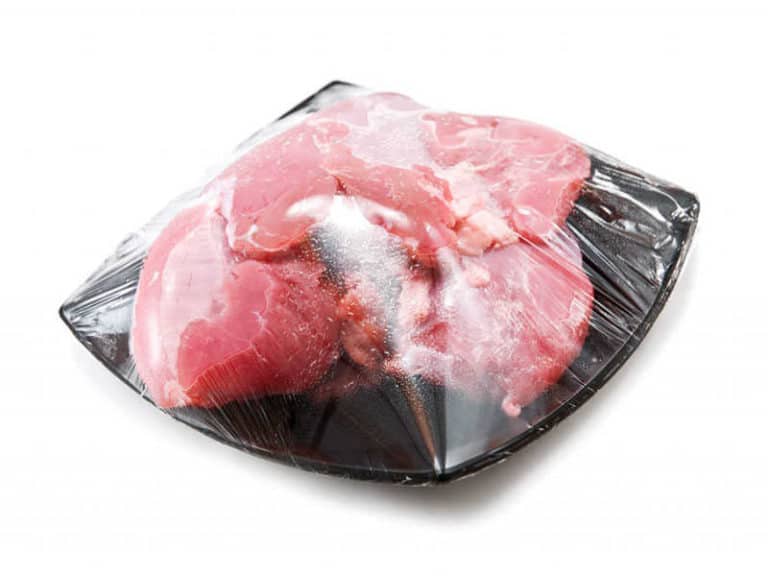
If you are vacuum sealing frozen foods, foods with bones, or any other food that has rough or sharp edges or protrusions, you will need to protect the vacuum storage bag from punctures and tears. Wrap the food item in a paper towel or other buffer material to prevent it from puncturing the bag during the vacuum sealing process.
Vacuum Sealing Your Food
Filling and Placing Your Food Storage Bag
When filling your food storage bag, it is important not to overfill. You should leave approximately 3 inches of space at the top of each bag to allow the vacuum sealer room to make a secure seal and for the bag to wrap around the bulk of the food during the sealing process.
As you place the open end of your bag along the edge of the sealing channel, make sure that you smooth out any wrinkles. If the two edges of your bag are not both placed together smoothly, you will not get a secure seal. At this point, for automatic or vertical machines, you will insert the edges of the bag into the sealing channel and begin the vacuum sealing process. For a manual machine, you will place the edge across the sealing strip or channel. When placing the edges make sure that the ends curl down toward the drip tray. This placement will assure that you have enough of the bag in the sealing zone and that any escaping liquids fall into the drip tray.
Vacuum Sealing
Once the edges of the bag are in place, you will close the lid and, depending on the style of machine, you will probably use a lever or dial to lock it into place. Now you are ready to begin the vacuum sealing process. On most models, you just press a button to begin.
If you are sealing a large or bulky food item, you can carefully smooth out the bag around the food as the air is being removed. Be careful not to pull the open edges out of the sealing mechanism.
If the food is releasing juice or liquid, watch the edge near the sealing channel to make sure the liquid isn’t entering the machine. The machine should now be doing all the work and will end the process once a sufficient amount of air has been removed. If you are sealing a delicate food item and want to interrupt the process, some machines will allow you to do so by hitting the seal or power button. Be sure to check your machine’s manual to see if this is possible before you try it, though.
Finished
Once the machine has completed suctioning the air out of your package and sealing it with heat, you are ready to remove your vacuum sealed food package and begin the next one. The rate at which you can seal each consecutive bag will depend on the make and model of your machine. Follow the manufacturer’s guidelines to avoid overheating and enjoy your fresh food and savings!

I have been conditioning my dehydrated food in zip lock bags. I was told that I can puncture this bag keeping food inside and then vacuum seal the prepackaged unit in my Food Saver. Is this true. That way I could have several small packs in one vac sealed bag. Thank you.
Dear Shannon,
First of all thanks for contacting me.
Of course, you can put several small packs in a vac sealed bag, if this is what you want to do. But I need to ask. If you have dehydrated food, why vacuum it? It should be just fine in a zip lock bag.
Kind regards,
Mary Ellen